
Custom attribute forms
Introduction
Section titled “Introduction”This module is designed to give you an introduction to creating custom attribute forms in QGIS. This function is useful for improved digitizing and for use in data collection apps such as QField and Mergin.
At the end of this module, you should have an understanding about how to create custom attribute forms in QGIS.
What you should already know
Section titled “What you should already know”Familiarity with Working with attributes and Expressions is highly preferred.
Custom attribute forms in QGIS
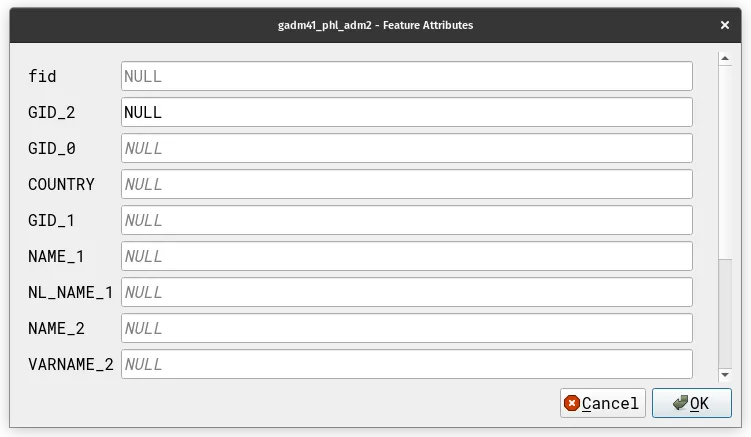
Section titled “Custom attribute forms in QGIS”When viewing, digitizing, or editing vector data in QGIS, you are provided with a dialog that allows you to view, edit, or input the attributes of a feature—this is often called the Attribute Form.
However, this default dialog may not always align or be the best option for your specific needs in terms of usability and aesthetics. This can present challenges especially when dealing with large layers or when involving collaborators who find the default forms less user-friendly.
Thankfully, QGIS allows you to fully customize Attribute Forms: from changing how the form looks to how individual fields are filled up. This allows you to optimize the data entry experience, streamline your workflow, and make it more accessible for others to collaborate with you.
Custom attribute forms
Section titled “Custom attribute forms”To see or edit a layer’s attribute form, right click on the layer > Properties > Attributes Form

Changing the interface
Section titled “Changing the interface”QGIS provides three ways to create the interface of the attribute form dialog.

Autogenerate
Section titled “Autogenerate”Uses the default view created by QGIS
Drag and Drop Designer
Section titled “Drag and Drop Designer”Allows the user to edit the view based on options provided by QGIS such as:
- Tabs: arranges fields into different panes in the attribute form
- Groups: arranges fields vertically but grouped into different sections
- Rows: arranges fields as one row
- Control visibility/collapsed by expressions: use an expression to control if a tab/group will be visible or if a group will be shown similar to conditional questions
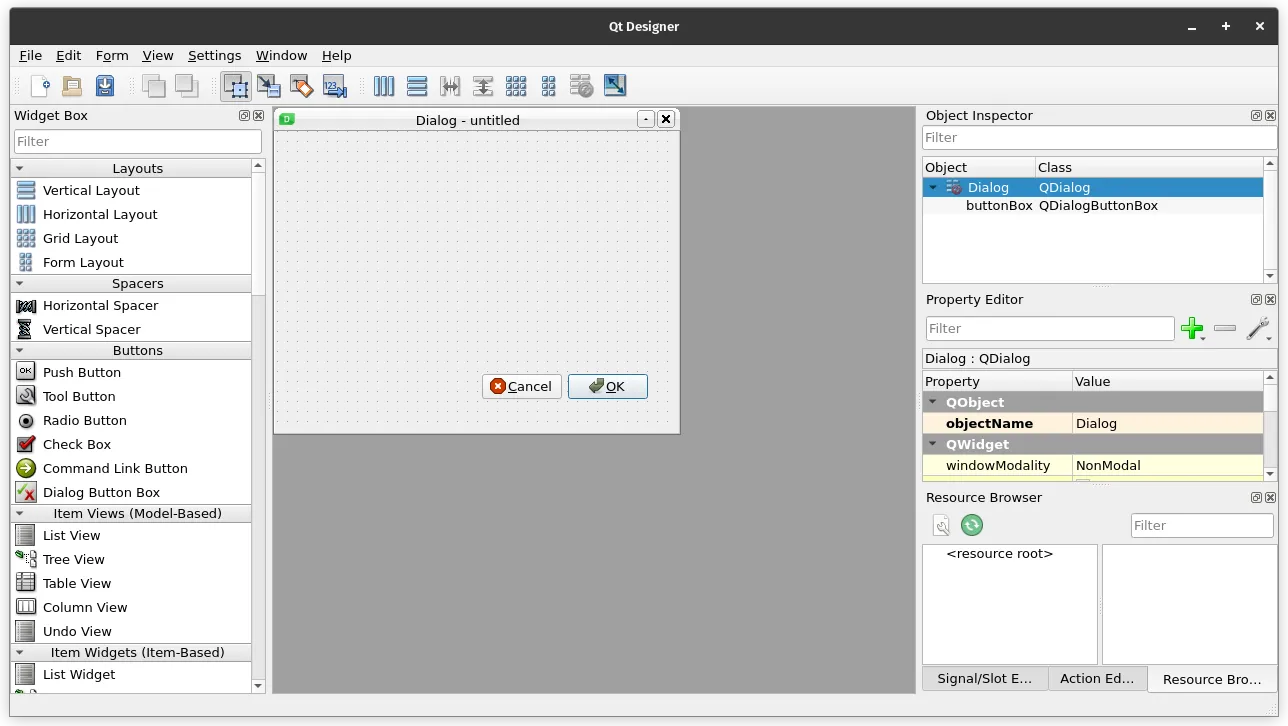
Provide ui-file
Section titled “Provide ui-file”Use a custom User Interface (.ui) file made with Qt Designer
Attribute parameters
Section titled “Attribute parameters”When you click on one of the layer’s fields, a panel will appear showing the different parameters that you can change.
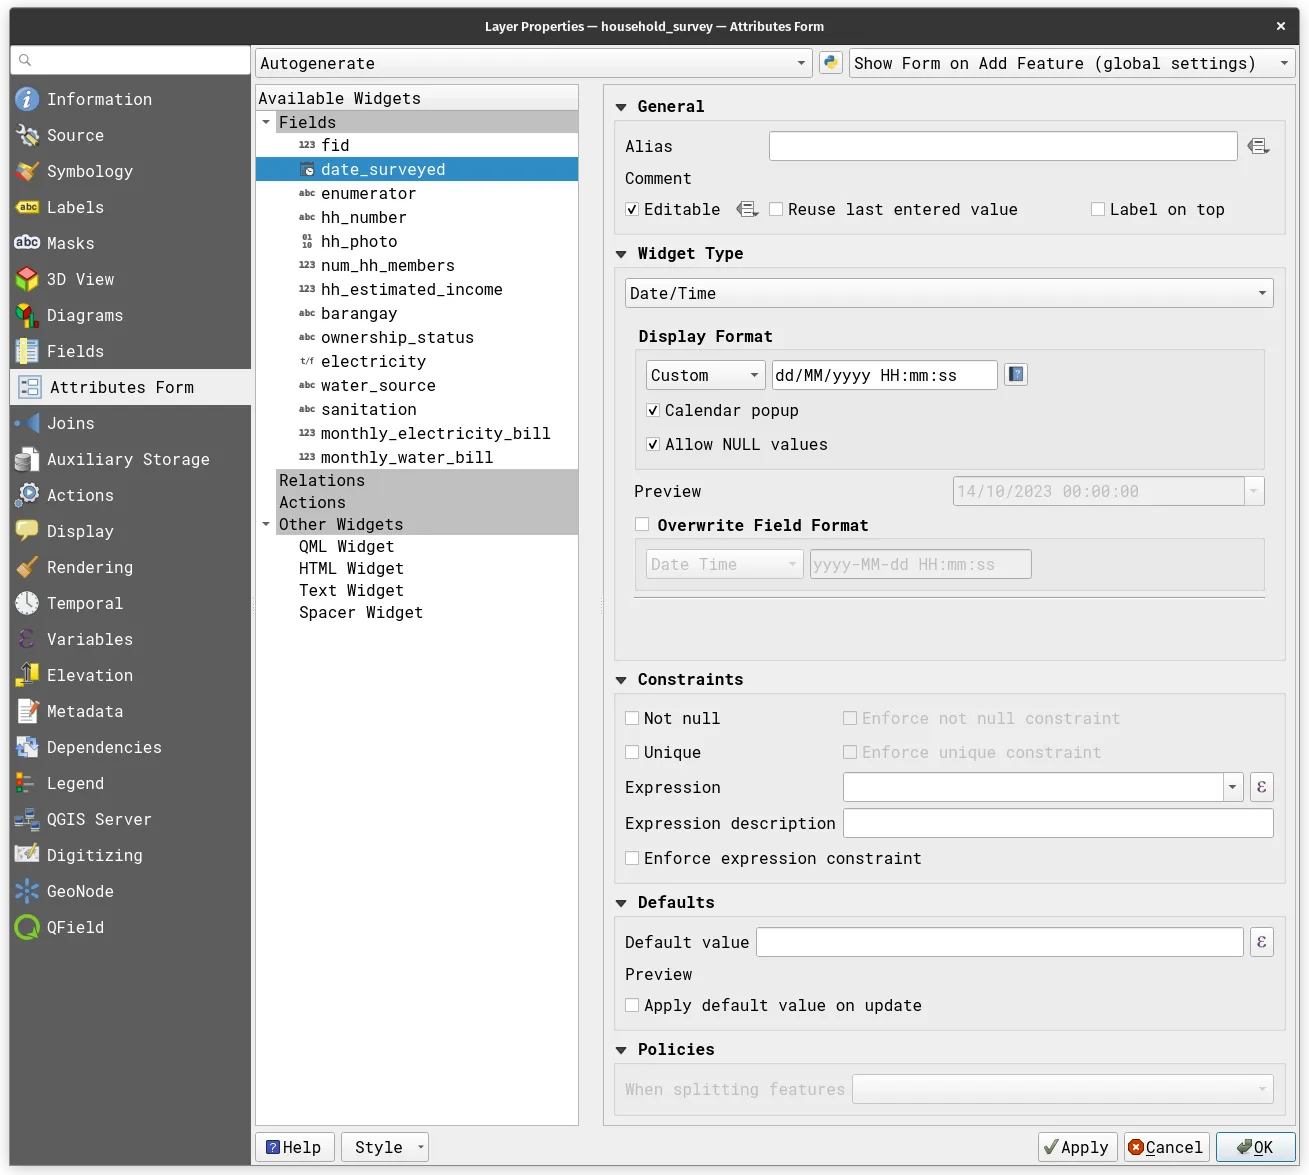
General
Section titled “General”Under General, you can specify:
- Alias: the text that will be used as label instead of the field name
- Editable: specify whether the field is editable or not
- Reuse last entered value: use the last entered value when a new feature is created
- Label on top: put the label on top instead of to the the left
Widget Type
Section titled “Widget Type”There are several widget types for getting field values depending on the field type.
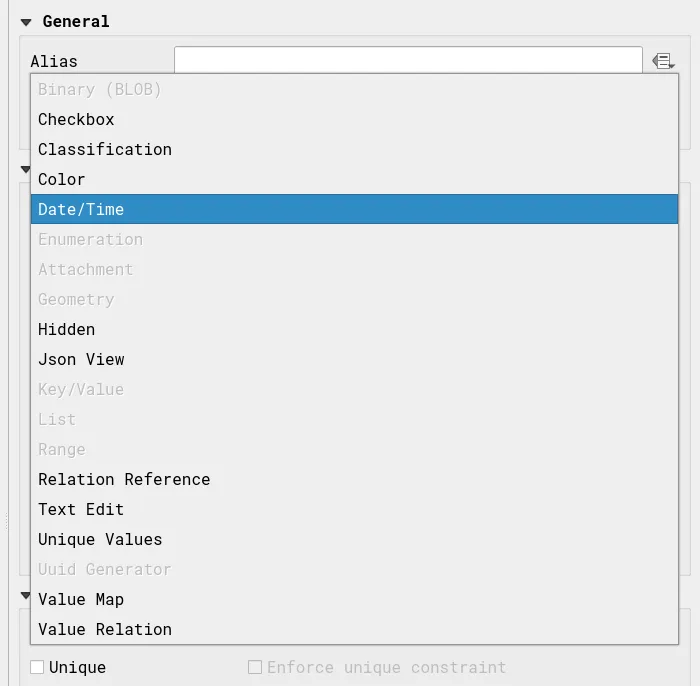
Examples of these widget types include:
- BLOB (Binary): uploads files/binaries directly to a database/data source
- Attachments: stores the path to a file/attachment
- Unique values: creates a dropdown list where a user can select a value but constrained/limited to the existing values of the layer’s field
- Value map: creates a dropdown list where a user can select a value based on a predefined list which can be (1) loaded from a layer, (2) loaded from a CSV, or (3) created manually
- example: list of provinces/cities/barangays
- Value relation: similar to lookup table or database foreign key: the value column is what’s shown in the dropdown/selection and key column is what’s stored in the field
Constraints
Section titled “Constraints”Constraints allow you to provide parameters to limit the values that will be accepted as valid by the field.
Defaults
Section titled “Defaults”Defaults allow you to specify the default value for the field when a new feature is created.
Policies
Section titled “Policies”Policies allow you to specify what to do when actions are made on the layer.
Scenario: Simple household survey
Section titled “Scenario: Simple household survey”In the next exercises, you will simulate a simple household survey with the following fields to collect:
- date_surveyed (date surveyed, datetime)
- enumerator (enumerator, string)
- hh_number (household number, string)
- hh_photo (house photo, BLOB)
- num_hh_members (number of household members, integer)
- hh_estimated_income (estimated household income, integer)
- barangay (barangay, string)
- ownership_status (ownership status, string)
- electricity (electricity, boolean)
- water_source (water source, string)
- sanitation (sanitation, string)
- monthly_electricity_bill (monthly electricity bill, integer)
- monthly_water_bill (monthly water bill, integer)
Your final attribute form should have the fields divided into 4 groups with the following widgets.
- Survey Information
- date surveyed
- enumerator
- Household Information
- household number
- house photo
- number of household members
- estimated household income
- number of household members
- ownership status
- Utilities and Services
- electricity
- water source
- sanitation
- Utilities and Services Information (should only appear if electricity is true or water source is service provider)
- monthly electricity bill
- monthly water bill
Exercise 5.1: Create an attribute form with custom aliases and basic widgets
Section titled “Exercise 5.1: Create an attribute form with custom aliases and basic widgets”In this exercise, you will edit the attribute form by changing the aliases and using some basic widgets.
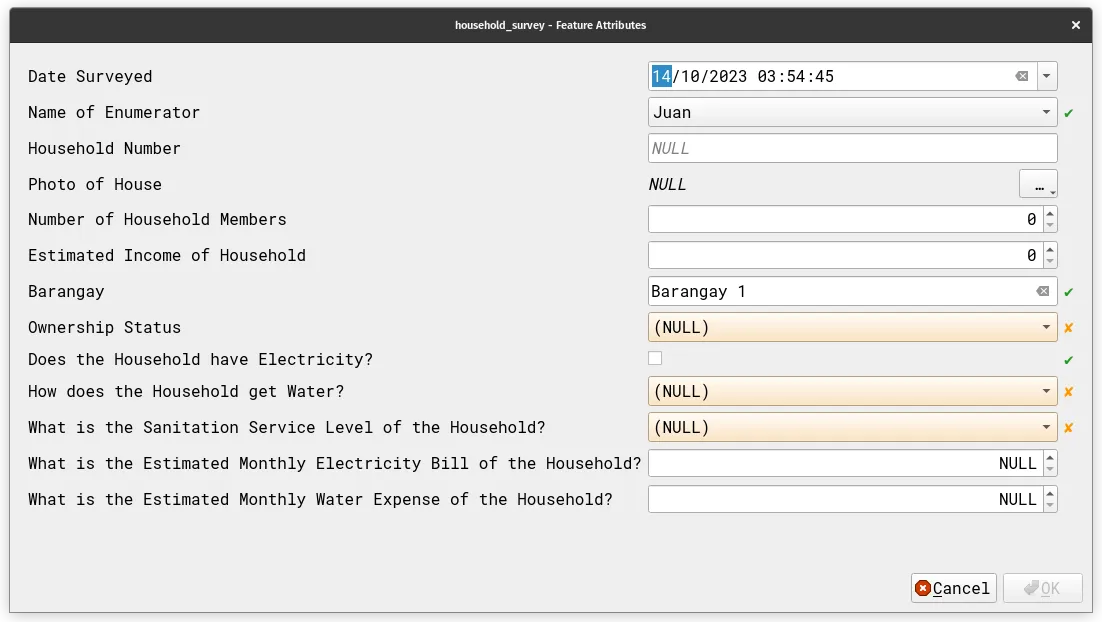
| Field | Alias | Widget Type |
|---|---|---|
| fid | Date Survey | Hidden |
| date_surveyed | Date Survey | Date/Time |
| enumerator | Name of Enumerator | Value Relation (enumerators layer) |
| hh_number | Household Number | Text Edit |
| hh_photo | Photo of House | BLOB |
| num_hh_members | Number of Household Members | Range |
| hh_estimated_income | Estimated Income of Household | Range |
| barangay | Barangay | Value relation (manila_barangays_gadm layer) |
| ownership_status | Ownership Status | Value Map |
| electricity | Does the Household have Electricity? | Checkbox |
| water_source | How does the Household get Water? | Value Map |
| sanitation | What is the Sanitation Service Level of the Household? | Value Map |
| monthly_electricity_bill | What is the Estimated Monthly Electricity Bill of the Household? | Range |
| monthly_water_expense | What is the Estimated Monthly Water Expense of the Household? | Range |
Exercise 5.2: Create a custom attribute form with tabs, groups, and widgets
Section titled “Exercise 5.2: Create a custom attribute form with tabs, groups, and widgets”In this exercise, you will group your attribute form to create a better-looking interface and apply some conditions.
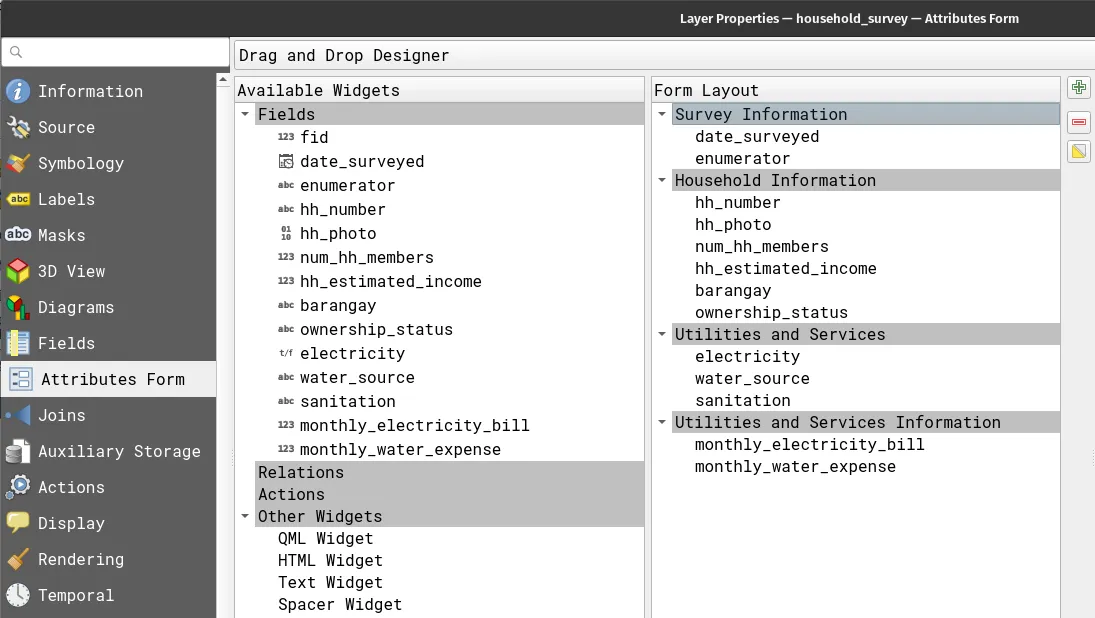
- On the Attributes Form tab, select Drag and Drop Designer.
- On the Form Layout panel, click the green plus button (
 ) and create a new Tab container for the Survey Information group.\
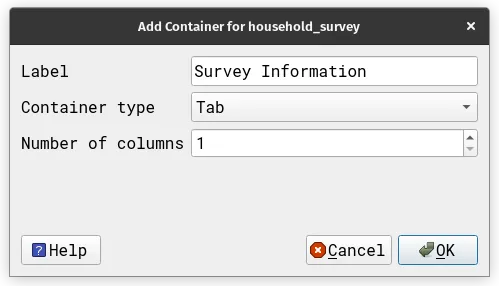
- Create 3 more Tab containers for the Household Information, Utilities and Services, and Utilities and Services Information groups.

- Still in the Form Layout panel, drag the fields so that they are under their corresponding groups/tab.
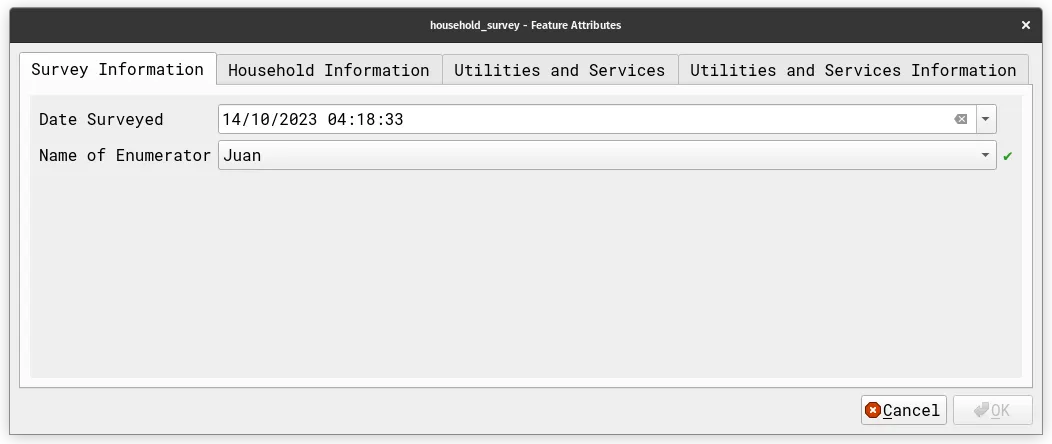
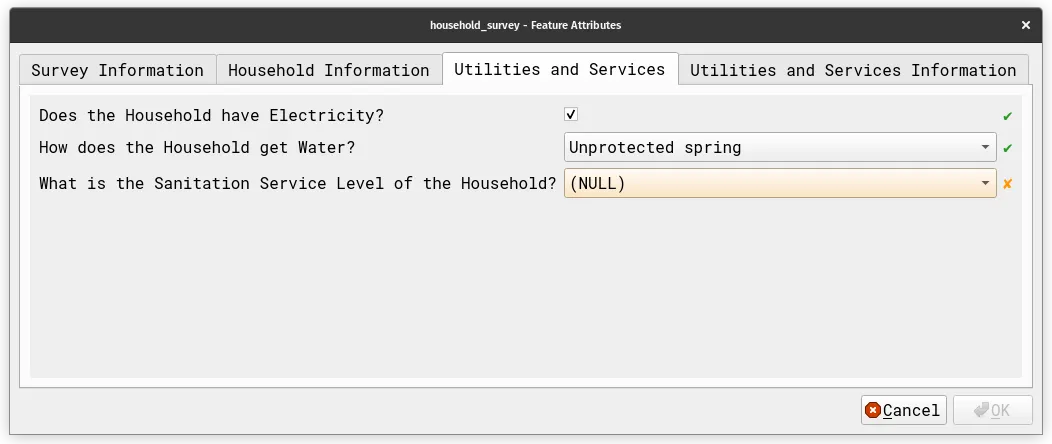
- Try to add a new feature. Your attribute form/dialog should look like below.
- For this step, you want the Utilities and Services Information group to be hidden by default unless the answer to electricity is True or the water source is Piped or Water refilling station. To do that, you need to apply Control Visibility by Expression on the Utilities and Services Information tab.
- To do this, apply the following expression in the Control Visibility by Expression parameter:
electricity OR water_source in ('0001', '0021')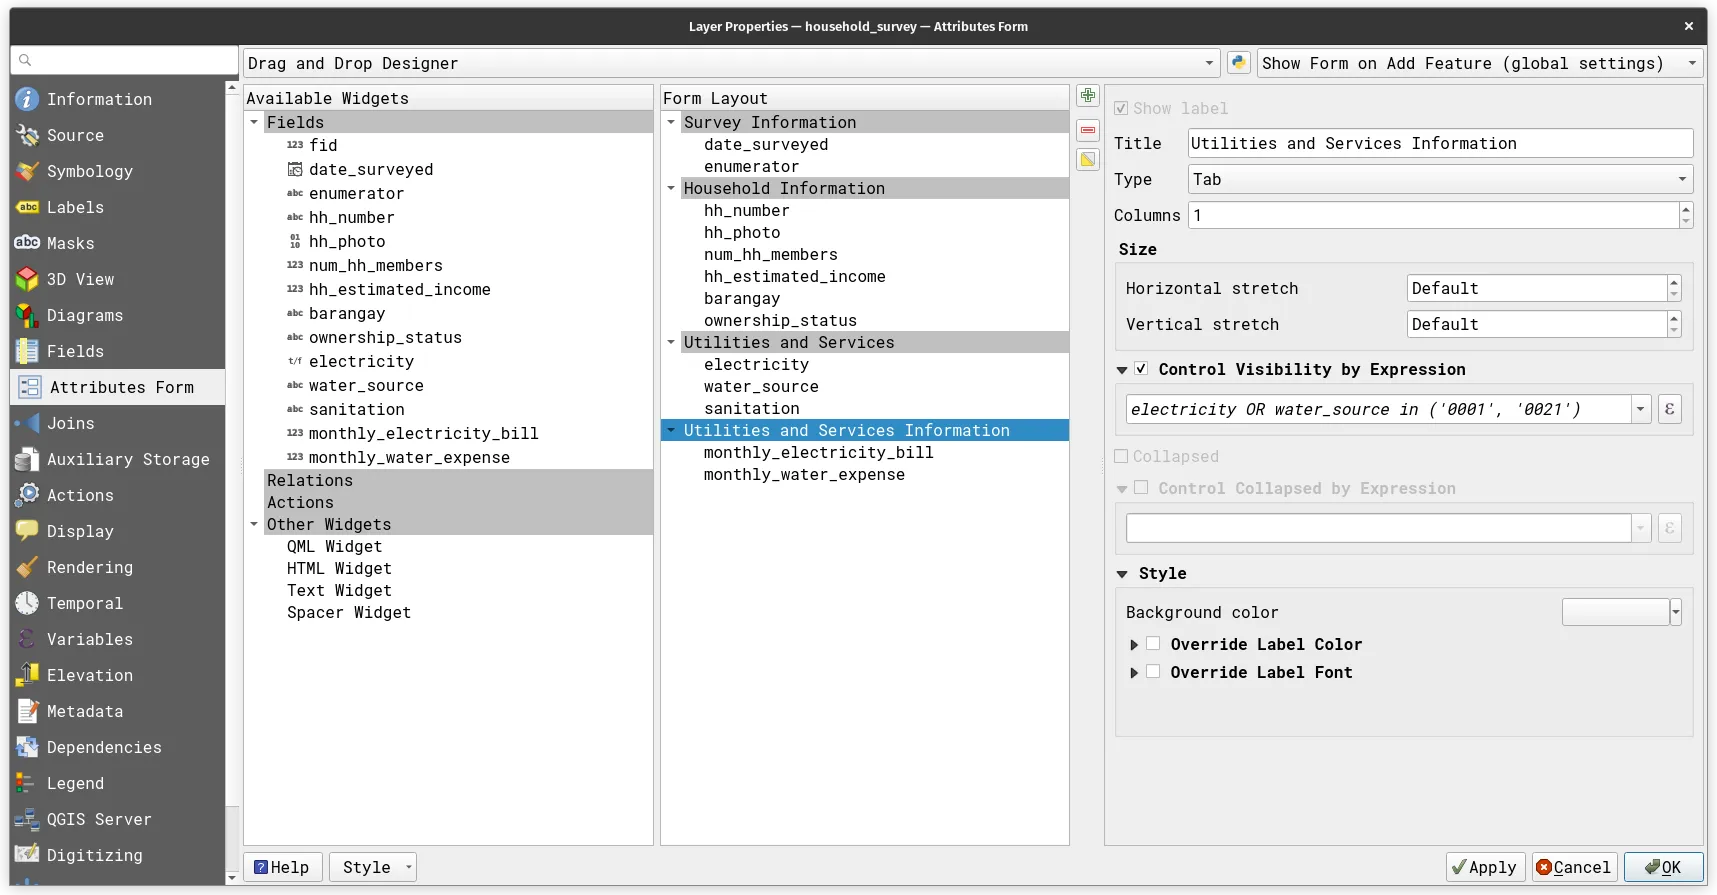
- Try and add a new feature. Notice what’s different.

Bonus: Auto-populate fields using QGIS expressions
Section titled “Bonus: Auto-populate fields using QGIS expressions”There are several ways to auto-populate fields while digitizing or adding new features. One is to Reuse the last entered value which is useful if the value of a field rarely changes between collection points. For example, if you know that the data collection will mostly be done within a few barangays, it might be good to set the barangay field to use the most recent entered value to save time.
Another option is to provide default values. Using default values can be as simple as providing a single value each time a new feature is added. However, default values in attribute forms are not limited to single values. In fact, the power of having default values really shine when utilized in conjunction with QGIS expressions.
Whether you’re digitizing data on your desk or collecting data on the field with QGIS using QField or Mergin, the task of adding new features to a layer is often cumbersome and time-consuming—especially if you need to manually add fields to the features you digitize.
Try to implement auto-populating fields in your attribute forms. You can refer to Expression Exercise 4.2. Auto-populating fields when digitizing based on another layer.
Certification and support
Section titled “Certification and support”Contact us or sign-up to our courses if you are interested in having this as an instructor-led or self-paced course.